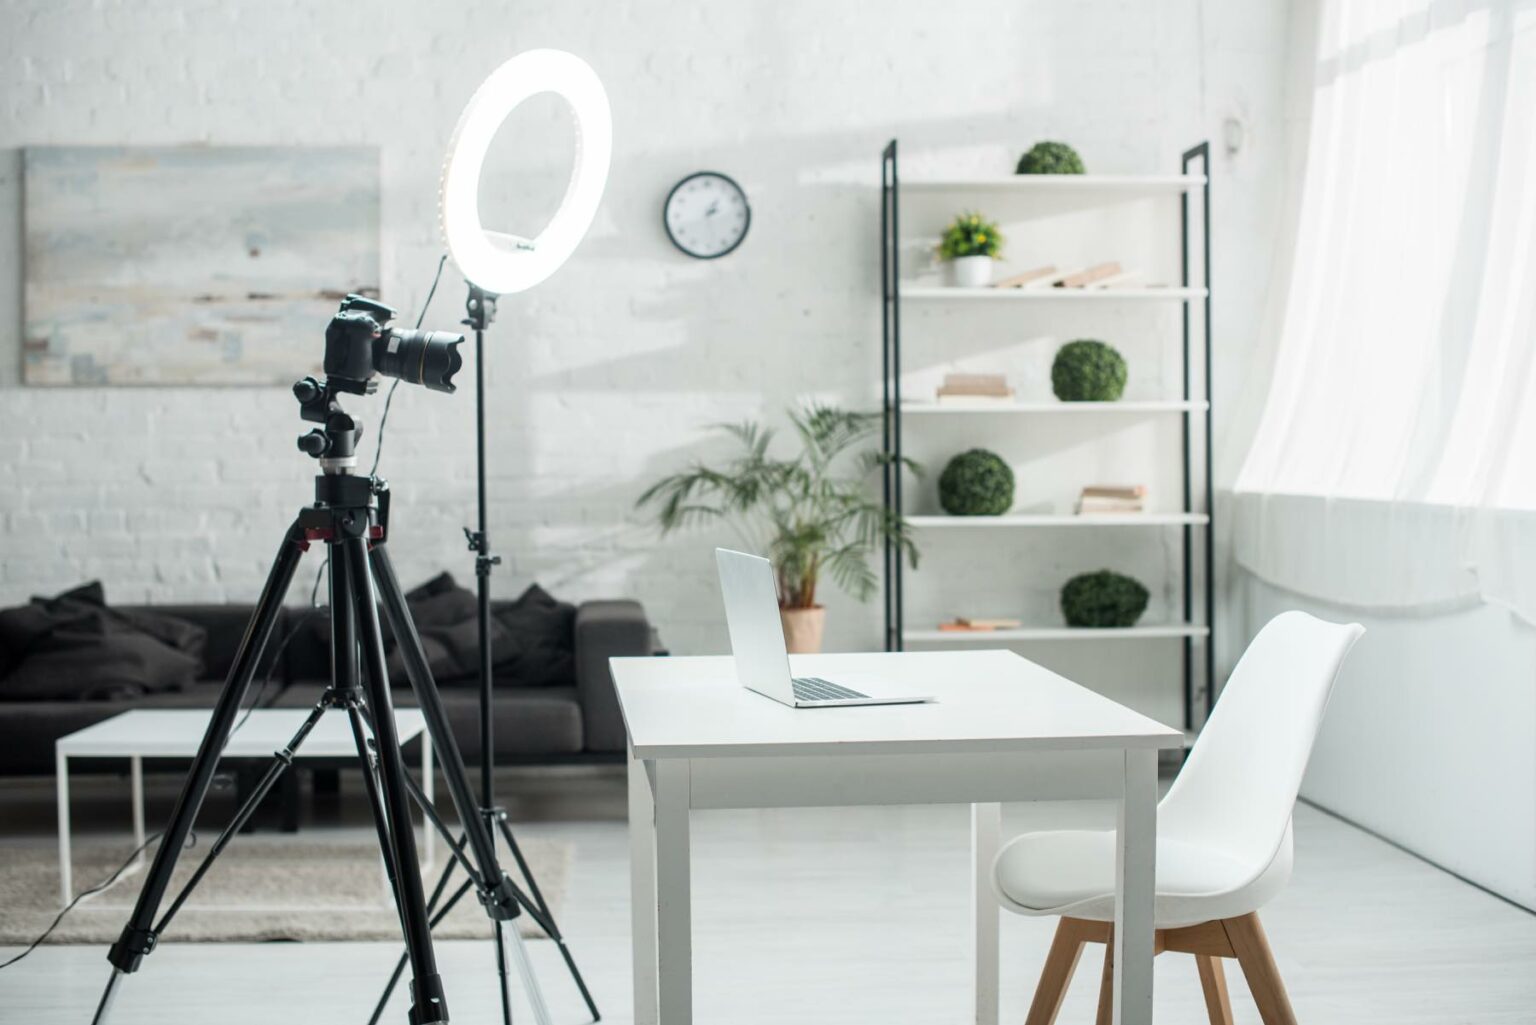
Tips to upgrade your at-home video studio (without spending a fortune)
November 12, 2021 — Simon Kelly
If you’re someone that uses video for your business, then looking and sounding your best on video can be a game-changer.
Not only does this help us feel more confident, but it gives us a better chance of making sure the message we want to share comes across clearly.
If you’re someone that uses or is thinking about using video for sales pitches, meetings, working with clients or for online courses, then you know how important this is.
The problem is that many people overcomplicate what they think needs to be in their video setup and they get overwhelmed with all the advice about what to buy and how to set it up, so they end up doing nothing at all.
What they need is a simple step by step guide with what to set up and in what order, as well as what to buy that’s going to give them a big quality gain for a modest investment.
In this article, I’ll share with you exactly that. You’ll learn tips on camera and lighting set up so know exactly what to buy and how to create a video space that will have you feeling confident knowing you’ll always be showing up looking your best.
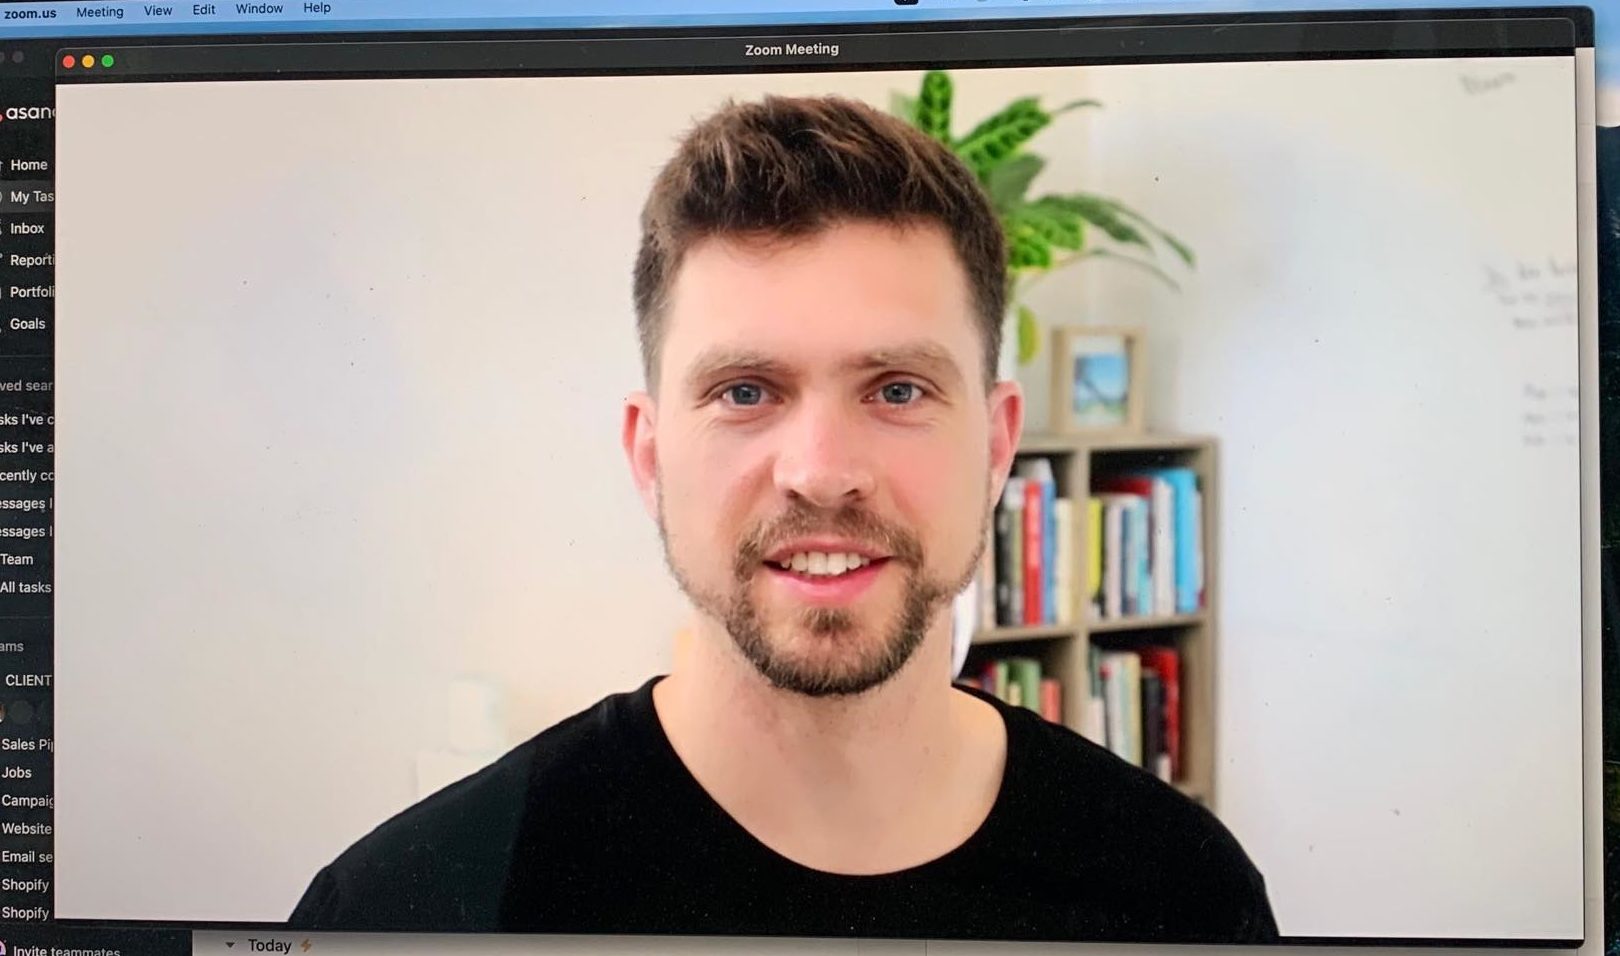
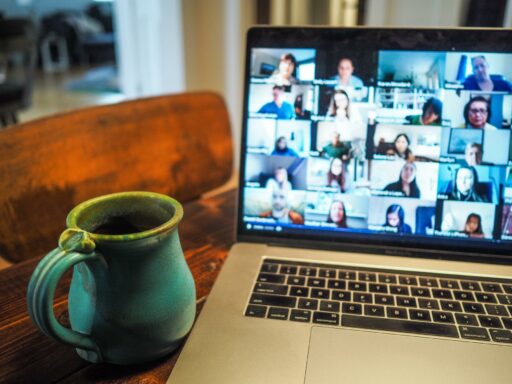
This is how my Zoom video meetings look, with natural light in front of me and slightly on the right side of my face.
It’s simple, professional and clear.
Let’s kick off with the most important part of it all – your internet.
Use fast and reliable internet
Nothing else matters in your setup if you have horrible internet and your video keeps dropping out.
The reality is, dropouts are going to happen at some point and your internet won’t always be perfect, but you can give it the best chance possible by investing in a quality internet provider.
Reliability is just as important as speed. It’s not just the download speed you’re looking for, but upload speed too.
Start by checking your internet speed using fast.com.
For clear video and audio, having internet speeds faster than 20mbps download and 5mbps up is ideal.
My advice is to get the best internet you can afford. This will be around $100/month in Australia and it’s well worth the investment.
I currently use Aussie Broadband NBN at my office in Elwood. It’s great and I highly recommend it. I previously used TPG Fibre-To-The-Building when I was based in St Kilda and it was fantastic too.
In terms of hardware, I have a Google Nest Router. It’s on the expensive side, but it works and it looks like something I don’t need to hide in a cupboard.
Wherever possible, use an ethernet cable so you’re hard wired into your internet and not using WiFi. This is much more reliable than WiFi, especially if your router is in a different room.
Once your internet is blazingly fast, it’s time to move on to sound, camera and video.
Sound: Use a professional microphone with headphones
Good sound is key. You want your voice to sound natural with a balanced overall volume and low interruption from echoes and background noise.
The best upgrade for sound is an external microphone.
I recommend the NT USB with a boom arm. It’s a brilliant microphone with quality sound and the boom arm keeps it off the desk to avoid picking up any desk bumps and keyboard presses.
Position the microphone close to your mouth, but not blocking your face. A good position is a little off to the side and lower than your mouth. I like to keep mine just off-camera, but I know a lot of people that are fine with the microphone on the camera and close to their mouth.
For headphones, this is a personal preference as it only affects your experience of the sound. I suggest not using bulky over the ear headphones as it’s less of a natural look than some minimal earbuds.
I strongly recommend having wired headphones handy. I keep mine plugged into my microphone and I don’t use them for anything else. They are AKG headphones and they don’t have amazing sound, but they are perfect for quick access.
I mostly use Bluetooth headphones, but when I don’t have them with me or the battery is low, I want to make sure I have my wired headphones ready as a backup.
For Bluetooth headphones, I recommend the Jabra 65t. They’re awesome.
If I didn’t lose my Apple AirPods within a month of buying them (I’m not crying, you’re crying!), I would probably be recommending them as well.
Lighting: Position lighting and get extra lights
You know how there’s a spotlight on a stage? Well, it’s there to help the audience focus their attention on what’s most important – the star of the show.
When you’re on video, that’s you. 🤩
Our eyes are naturally drawn to what’s bright and lit up, so make sure when the camera’s on, you’ve got great lighting and you’re positioned front and centre.
Lighting in front
Lighting in front of you will make it easy for your guests to see your face and will put the focus on you.
This will prevent them from getting distracted by what’s in your background so that the message you’re trying to communicate is more likely to be received.
Start by looking at the natural lighting in your space. Is there a window you can position yourself in front of? Is there lighting that you need to block off?
If there’s any light source in the space where you have you’ll be on video, make sure the lighting is in front of you. A little to the side is ok, but definitely not behind you.
Soften light with a shower curtain
Having a window is ideal, but if the sun goes directly into that window, not only is it going to be very hard for you to see, but the direct light will be too harsh.
What you want here is soft light.
To create soft lighting for your videos, you can hang a white shower curtain over the window. This costs around $15 and turns the harsh sunlight into a softer, more natural light that would make even a photography studio envious.
You could probably use something a bit more chic and fancy than a shower curtain, but I like it 😎
Get an extra light
When you’re short on soft sunlight, a powered light will do the trick.
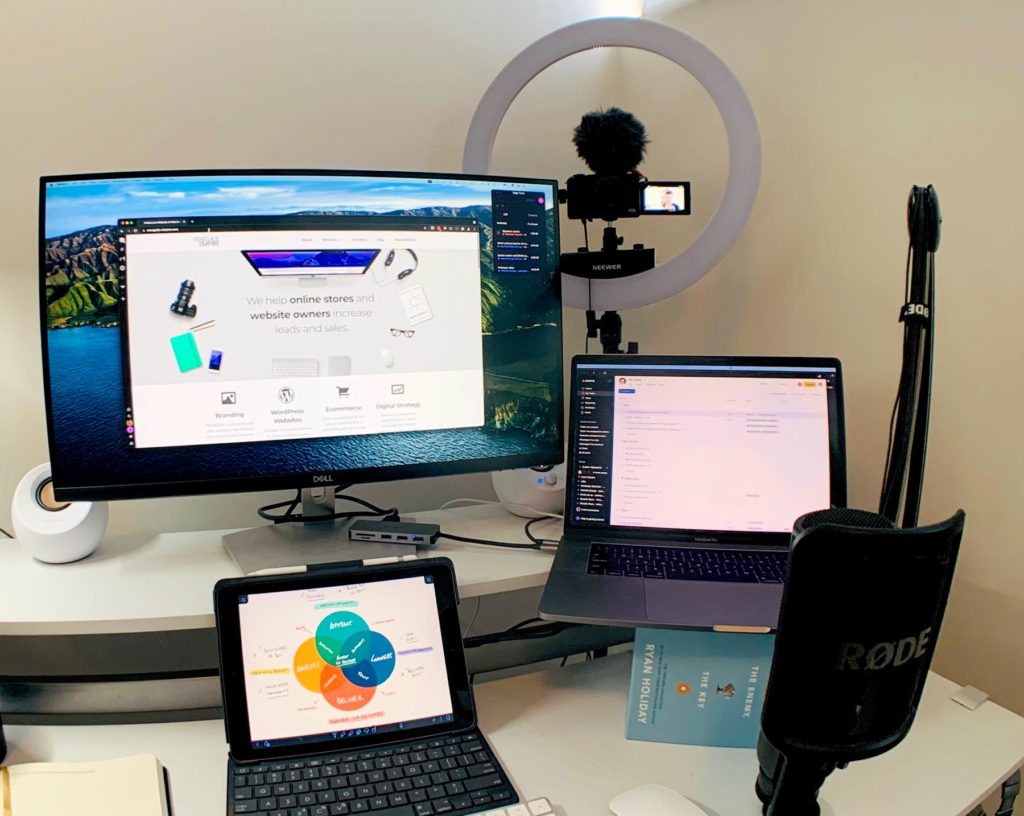
I recommend the Neewer ring light. It’s on a stand, which is perfect for sitting and stand up positions. It can be adjusted with different colour temperatures to give your face a natural look (from moon tan to overcooked chicken).
By getting your lighting right for any time of day you know you’ll be ready always to be in the spotlight, even at night.
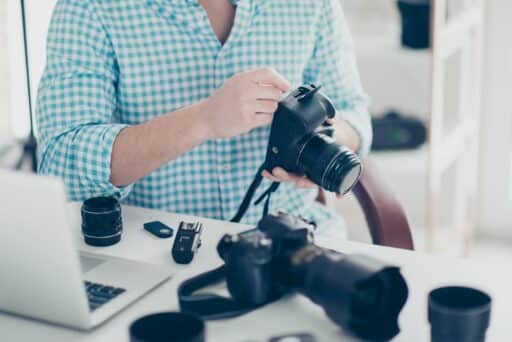
Video: Get a Canon M50 Camera
The Canon M50 is a mirrorless camera that can be used as a webcam. For some people, this might seem like overkill for a webcam, but I think it’s 100% worth it, especially if your business relies on you being on video.
The number of comments I’ve had where my clients or people I’m meeting with have said “your video is always so clear! What camera do you have?“
Well, it’s the Canon M50, thanks for asking 😎
This camera will turn your videos from standard to stunning while keeping the set-up nice and simple.
It has a focus feature that automatically tracks your face and keeps it looking sharp, even while the background has that oh-so-special background blur effect.
I have my M50 plugged in via USB to my Macbook Pro and it sits nicely and securely in the centre of my Neewer ring light.
You’ll need to get a plug-in power so you don’t have to worry about batteries dying and you’ll also need to install the Canon webcam software so that the camera will show in video meeting apps like Zoom.
If this is just way out of your budget, then the Logitech C922 webcam is what I’d suggest instead. I used this webcam for years and it was absolutely fine (but I’m never going back!).
When positioning the camera, make sure it’s in front of you (hopefully that’s obvious), slightly off to the side and slightly above eye level. Having the lens close to your screen will help so you don’t need to turn your head or move your eyes too much between looking at the camera and looking at your video guest.
Background: Keep it simple
I spent a lot of time trying to get my background “just right” with all kinds of lamps and books and trinkets like the cool YouTubers are doing. I could never get it to the standard I was hoping for until I stopped and remembered a golden rule…
Keep. It. Simple.
If you’ve got good lighting in front of you, and you’re using a great microphone, and your camera is looking sharp, then you’re already a million miles ahead from a standard video-up-the-nose set-up that many people have.
So stick with the basics for backgrounds.
There is likely to be some slight blur in your background using the M50, even with the stock lens, so this will hide the detail on exactly what you have back there, which can be a good thing.
What I’ve found for camera positioning is that when it’s pointing from one corner of the room to the opposite corner, it looks much better than just pointing directly to a flat wall. It gives some extra depth that looks great.
The classic bookshelf is great to have in there as well as it adds some nice colour and you can show off some of your favourite reads.
Adding in a plant or two is great for aesthetics and has the added benefit of being shown to increase productivity by as much as 15%.
I’ll take whatever productivity gains I can get! Plus, I really enjoy taking the time to water my office plants and be present for a few moments. 🪴
Now test your set up!
You’ve made it this far – congratulations!
This is going to be one mighty fine video set-up, but you’re not quite finished yet.
The key is to test, test and test some more.
You want to test everything from start to finish multiple times so you can easily start up and kick off your video calls even if you missed that 5-minute calendar reminder and have 10 seconds to get ready and go.
Get some help by asking a friend to book in a couple of spots in your calendar so you can test it all out.
Make sure you perform these tests:
- Go from everything off to everything on. See how long it takes.
- Test changing your microphone within Zoom.
- Test changing your headphones in Zoom.
- Test when you have one thing unplugged and you need to plug it back in quickly.
- Test if your internet goes out and you need to switch to phone tethering.
- Record yourself in Zoom and check the video and sound in the recording.
Do it again and again so that you’ll be confident and ready to show up and give it your best next time the lights are on and the camera is rolling.
Issues will come up and by testing, you are more likely to keep your cool knowing that you have some workarounds and quick fixes ready to go.
Dos and Don’ts
It should go without saying that generally looking after your appearance as if you were going to be face to face with someone is a basic necessity.
Sure, you can get away with a suit jacket on top and board shorts below, but make sure that you’re comfortable and feel good.
Don’t skimp on the things that you know will give you confidence.
You might be surprised what brushing your teeth or spraying some cologne/perfume can do for giving yourself a fresh feeling and a little energy boost.
Another place where I see many people get stuck is over buying gear and over adjusting their backgrounds (OK, when I say “many people” I mean me!).
There’s always going to be something that looks slightly better and more expensive that you could add to your kit. But what for? Be careful you don’t become addicted to the tech upgrades as a distraction from doing the actual work you need to do.
Once you’re at a point where you would score video and audio quality a 7 out of 10 or higher, then you’re golden.
Stop, give yourself a high five and get back to building the business of your dreams.
Pro tips
Hungry for more? Take it to the next level with these bonus tips:
Use text expansion shortcuts
If you have regular Zoom meetings, it can be handy to set up some text expansion shortcuts to save time. What is text expansion? It’s when you type something short and it automatically expands to something else.
For example, typing “omw” can automatically expand to “On my way!”
The two shortcuts I recommend are:
1 – Link to my personal Zoom room. When I type !zoom it then shows a link to my Zoom room so I can quickly share it with someone and we can get started right away.
2 – Link to book an appointment in my calendar. When I type !mycall it shares a link to my appointment booking page, so someone can pick a time that works best for them to book in a call. My appointment booking system then takes care of the rest so it shows up in my calendar, with the Zoom link ready to go.
I use the app aText to set this up.
My friend Ray Milidoni at Farming secrets let me know that Macs already have the ability to create this kind of keyboard shortcut, which also means they can be used on an iPhone too.
This is super powerful and awesome if you use your phone a lot for work, but I just haven’t set this up myself yet.
Use Noise cancelling software
Background noise can be super disrupting to your listeners, so it’s best to be in a quiet space.
Sometimes, that’s just not possible, so that’s when you can use noise-cancelling software to help.
Within the Zoom settings, you’ll find an area to use the built-in noise cancellation features. I recommend putting this at auto.
To almost completely eliminate background noise for your listener and for you, then the app Krisp.ai is a game-changer. Take it for a spin and hear the difference for yourself.
Action steps
The fastest, easiest and least expensive thing you can do is to position yourself in good lighting and move your camera to eye level.
From there, you can follow the steps in this article to upgrade your set-up at a pace that suits your budget and enjoy the confidence you’ll get from sounding and looking like a pro on video. 😎
Author
Simon Kelly
Simon started his first web agency in 2009 which he merged with the SGD team in 2023. With a strong background in digital strategy and a history of working with fast-growing Australian companies, including CyberCX, Envato and Agency Mavericks, he's passionate about using ethical digital marketing that delivers business value. Simon's experience includes coaching digital agencies, running digital marketing workshops, driving growth and excellence within the SGD team.
Next Article

WordPress Page Builder Review: Elementor, Bakery or Custom?
October 29, 2021


Get Started
"*" indicates required fields

Tell us about your project
"*" indicates required fields